In last week’s report, I talked about replanning the remainder of the project backlog for The Dungeon Under My House, my second Freshly Squeezed Entertainment project.
This past week, I started work on my first set of tasks for the new year.
Sprint 2024-1: Pre-production and initialization
Planned and incomplete:
- Render dungeon based on light levels
I took a family trip earlier in the week, but even so, I managed to get quite a bit done when it comes to handling lighting in the dungeon.
I envisioned having light sources that spread light to adjacent cells, with the brightness lowering as it goes, similar to the lighting in Minecraft. I also wanted certain dungeon environments to have an ambient light, so there is no actual light source, and those cells are just by default lit by a certain amount.
Now, that still leaves the question of how to actually represent and implement lighting in the dungeon.
Since the dungeon is represented as a collection of dungeon cells, I decided to create an associated collection of dungeon light levels.
So for a given cell at a particular location, there would be a dungeon light level at that location.
The dungeon light level is represented as a color and a value that indicates how bright the light would be.
0 would be pitch black, and 10 would be full brightness.
By default, the dungeon light levels would be whatever the ambient levels are for those corresponding cells.
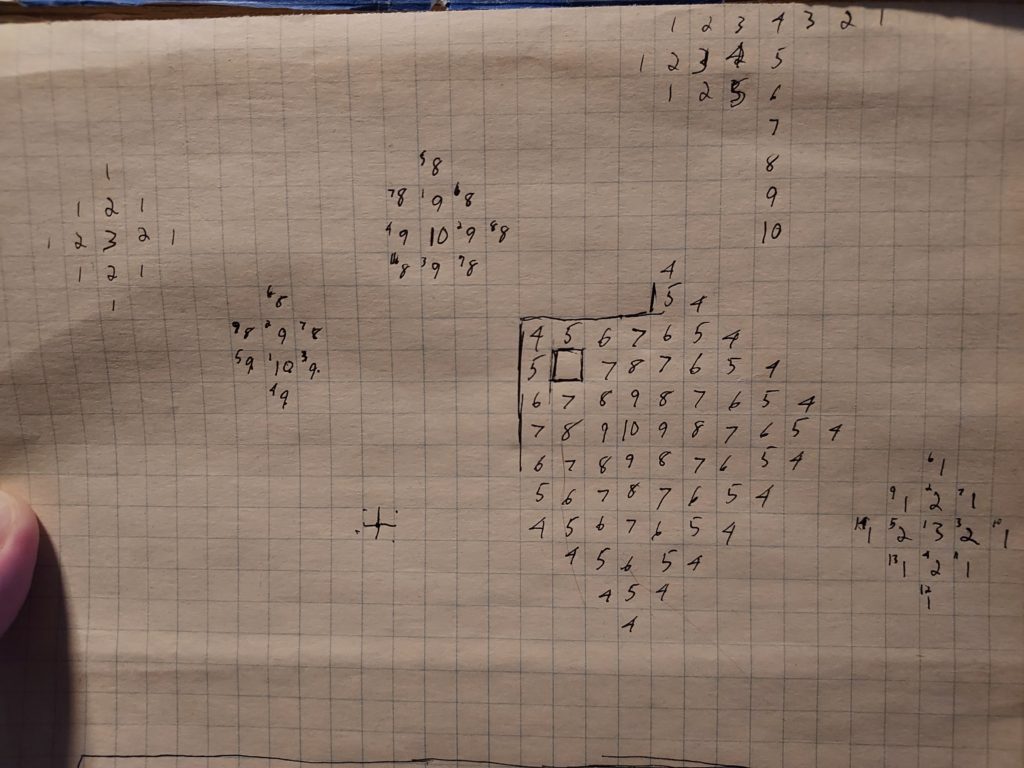
Then for each light source, the light would spread while attenuating.
After manually trying a few approaches on paper, I hit upon a way to handle the light propagation and attenuation, and I wrote out my attempted algorithm before writing any code for it.
And then, since I knew this code could get complicated as I was figuring out edge conditions, I test-drove it.
And I was immediately glad I did. I could very easily have written code that I thought should work but that wouldn’t have done what I wanted. To date, I wrote seven unit tests for this lighting code, with each one either adding functionality or confirming that certain functionality would work in certain cases, such as dealing with closed vs open doors.
I added some logs and I modified the code to ensure that it didn’t process dungeon cells that it didn’t need to, which saves on processing time. This kind of optimization wasn’t captured in my unit tests, but the tests did verify that the end result was correct even with fewer cells getting processed.
While I am confident that this code is fairly efficient, I also know that I don’t need to call it frequently. Unlike an action game, which might need to update lighting in real-time, this game only needs to update the lighting data when something actually changes, such as when the player enters the dungeon, toggles a light switch, or opens or closes a door or otherwise changes an obstacle that blocks light.
By the end of the week, I was confident that the lighting system worked, so the only thing left was to make use of it when rendering the dungeon.
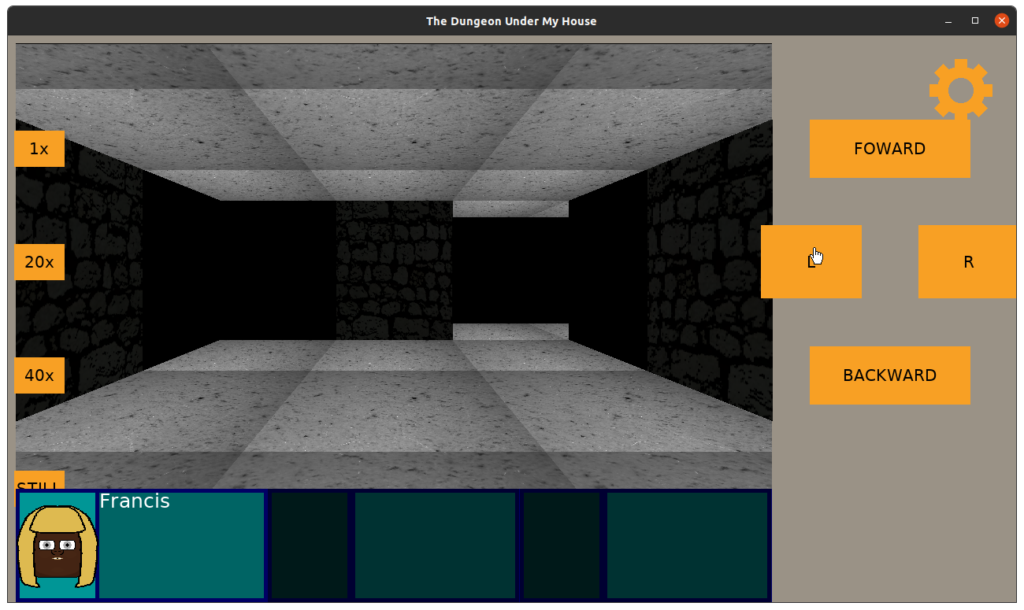
The dungeon walls and “things” such as doorways and ladders were fairly straightforward to update. Basically, for each column for my raycasting code, it would draw part of a texture and tint it by that cell’s color and brightness setting.
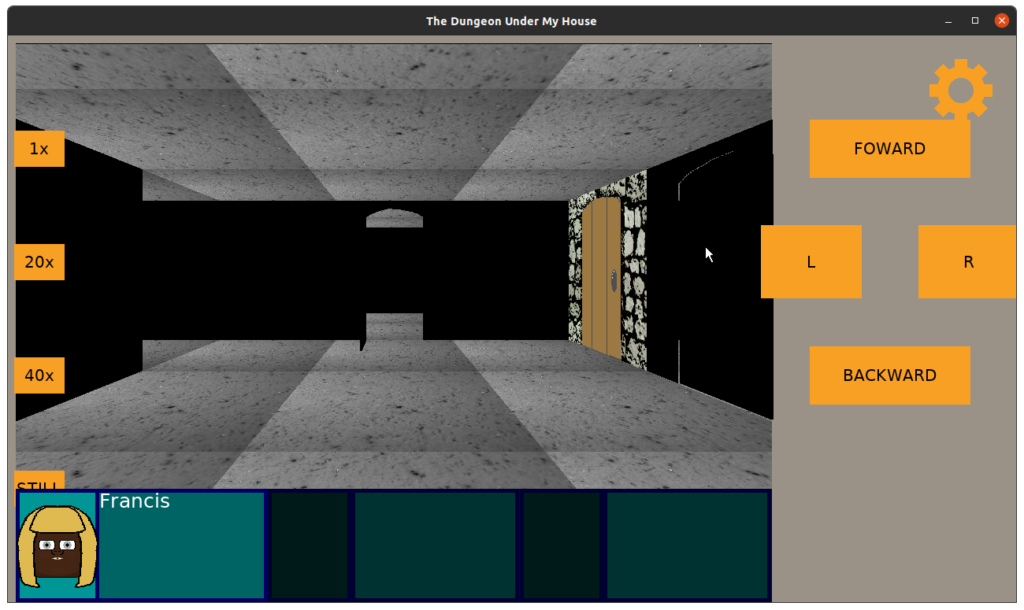
And it looks more or less fine (if a bit dark in this room). Currently I treat the brightness value as multiples of 10%, but perhaps 10% drops in brightness are too drastic, especially going from 10% brightness to 0%. Maybe instead of linear drops in brightness it should be a different curve, but perhaps brightness levels should be multiples of 5% and so the brightness level should go from 0 to 20. I’ll toy with it to see what might look good.
But first, I still need to tackle the ceiling and floors, which handle rendering a bit differently.
While the walls draw columns of textures and can be tinted, the ceilings and floors draw individual pixels of textures, each of which represents the actual pixel color from the source texture as a Uint32 value.
Now, when I usually deal with color, I am dealing with RGBA values, with each of R, G, B, and A being a value from 0 to 255, or even using hexadecimal values if I want to match what I might see in HTML color codes. So 0xff would be equivalent to 255.
Drawing walls, the only color I deal with is my tint value, which is the dungeon light level’s color multiplied by its brightness percentage.
But drawing the ceiling, I need to directly modify the color value of the pixel in question, and I am still figuring out exactly how. The Uint32 value should correspond to RGBA-like values, and in this case, I believe it is ABGR8888 in SDL2’s representation.
But I ran out of time before I figured out if merely bit-shifting and using my tint value directly in a similar way that I do for walls will result in something that looks right.
So that’s the first task to tackle this coming week.
Although I am also curious what is up with this doorway which is rendering at full brightness despite being in what should be a completely darkened room.
Thanks for reading!
—
Want to learn when I release The Dungeon Under My House, or about future Freshly Squeezed games I am creating? Sign up for the GBGames Curiosities newsletter, and download the full color Player’s Guides to my existing and future games for free!


2 replies on “Freshly Squeezed Progress Report: Dungeon Lighting”
[…] Here’s the companion video for Monday’s Freshly Squeezed Progress Report: Dungeon Lighting: […]
[…] week, I reported that I had started working on adding lighting to the dungeon walls and doors in The Dungeon Under […]